Beginner’s Guide to Using Google Slides in Your Biology Lessons
Happy New Year! I can’t believe we’re already in a new year!
One of my resolutions has always been to try something new in my classroom. Maybe that is one of your resolutions, as well.
If you have never tried using Google Slides as part of your Biology lessons, this would be a great time to try. There are so many benefits to using Google Slides, such as:
- Less time spent at the copying machine
- Ability to create a variety of activities that will keep students engaged
- Free resource
…. And the list goes on and on!
Before we get started on our journey with Google Slides, feel free to browse my Google Slides Biology Activities. Let’s take a look at how to get starting using Google Slides during your Biology lessons.

1 – Setting Up Google Classroom
The first thing you will need to do is set up a Google Classroom using your school’s Google account.
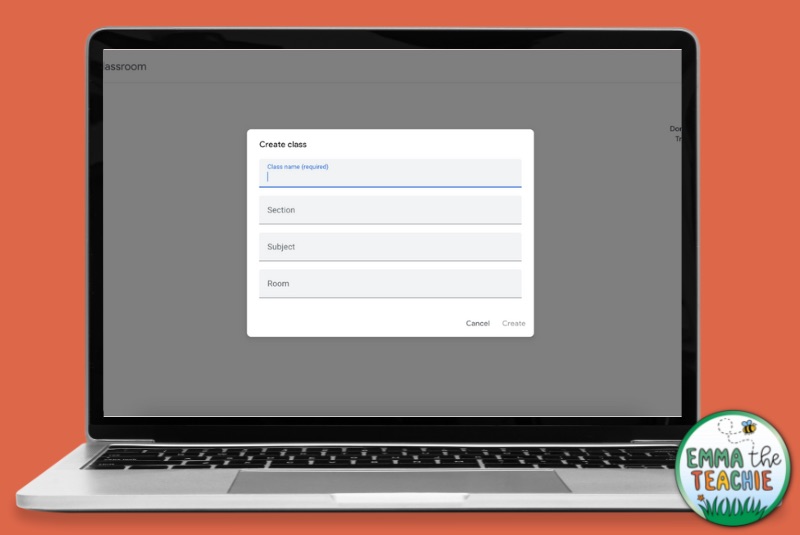
Once you are in the Google Classroom platform, click the “+“ and choose “Create a Class.” Then, fill in your class information. Congratulations. You’ve created your class!
You can also customize your Google Classroom with different colors to match your classroom and personality.
Now, you will need to get your students enrolled in your course. There are two ways to do this.
First, you can email each student the invite link. In my opinion, this takes too much time, so I opt for the easier method.
The other way is to project the class code, and students will be added to your class when it is entered.

Now all of your students are in. Great!
Let’s move on to creating a new Google Slides activity.
2 – Creating a New Google Slides
You’re now ready to jump in and create your first Google Slides activity!
Ready, set, let’s go…
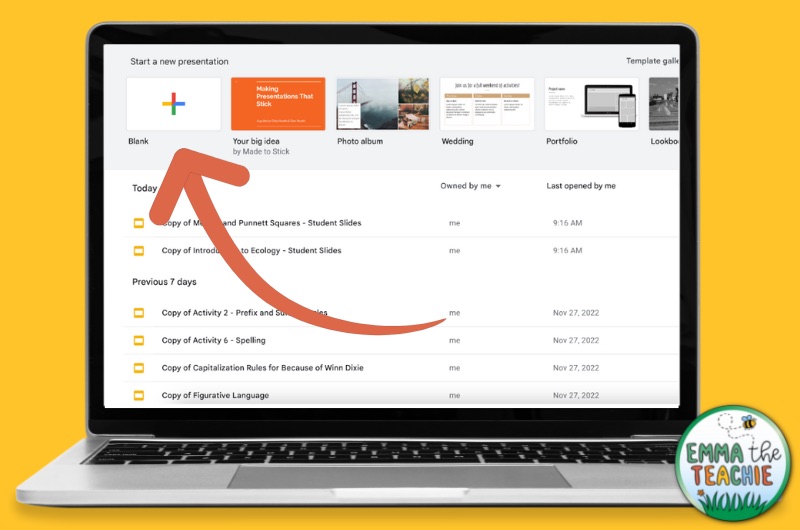
Go to the Google Slides homepage. Open a new presentation by clicking the Blank Presentation option towards the top of your screen.
In the top left of the new Google Slides presentation, rename your file so you can find it later on.
From here – you have free rein!
In a Google Slides presentation, you can add, edit, and format text. There are a variety of fonts loaded into Google Slides to personalize your presentation. You can also change the color of the text, as well as its style (bold, underline, etc.).
In addition, you can also change the slide background color to add some pizzazz to your activity. Images and videos can also be embedded into Google Slides.
Overall, the design elements and abilities are endless.
3 – Examples of Biology Activities Using Google Slides
There are so many activities that you can create in Google Slides, and I am going to share a few of my favorites with you.
You can get loads more ideas in my blog post 8 Fun Ideas for Biology Google Slides Activities.
One of the ways I love to use Google Slides is as a note-taking activity to reinforce concepts discussed in class, especially vocabulary. I will usually create a table that includes the vocabulary term on one side and a place to type the definition on the other side of the screen. Within this activity, I may also include links for students to reference while working.
By putting links into your presentations, you’re also encouraging your students to learn on their own.

Google Slides are also great for making interactive activities for students. The use of interactive activities is beneficial because it keeps things interesting for the students. Students can get away from the monotonous plugging and chugging that they are used to.
When it comes to interactive activities, the possibilities are limitless. Some of the activities I create include drag-and-drop activities and highlighting and annotating passages.

Each slide can also include a mixture of different types of interactive activities. Students can, for example, type in the blank space of a Punnett square and then drag the traits to show the right ones.
Google Slides are also great for classroom differentiation. Just duplicate the slide by right-clicking on it in the sidebar. Then modify the activity to add extra support. You now have two versions of the activity!
Common ways to differentiate include adding word boxes to word fill activities, adding extra tips on the side of the slide, and providing sentence starters for open response activities.
Simply put … Google Slides are awesome.
4 – How to Assign Google Slides in Classroom
Once you have your Google Slides activity created, it is time to assign it to your class.
Go to your class in Google Classroom and click on the Classwork tab. Select Assignment from the Create menu.
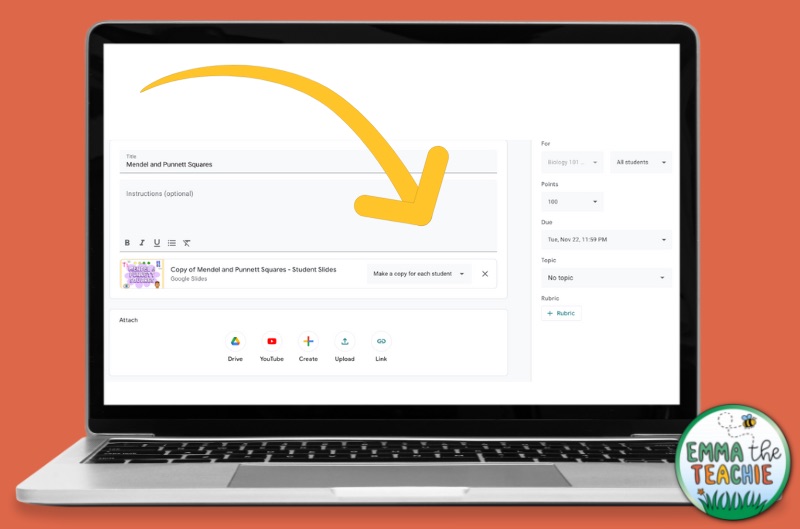
Fill in the details about the assignment.
Attach your Google Slides presentation through Google Drive and choose “Make a copy for each student” – this is important as it means each student can work on their own version of the Google Slides.
Hit assign, and you’re good to go!
5 – How to Grade Google Slides Activities
Okay, almost done.
You’re doing great!
You created and assigned the Google Slides. All that’s left is to grade the activity.
Find the assignment under the Classwork tab in your Biology classroom. Click on the number of students that turned in the assignment and choose the student’s assignment you wish to grade.
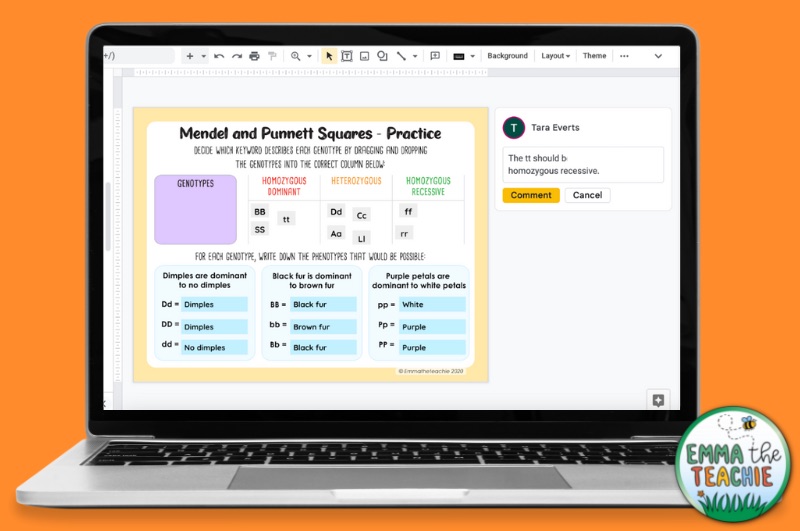
Once the Google Slides activity is on your screen, you can navigate through the slides. As you are grading the activity, you can add comments so students can see what they missed and your feedback.
The last thing to do is just enter their final grade!
Are you ready to try using Google Slides?
Our journey to creating Google Slides assignments has come to an end and I enjoyed every minute.
You will have so much fun creating activities for your Biology classroom!
If you want to check out my ready-to-use Biology Google Slides Activities, check them out in my shop!
Are you signed up to my newsletter? I’d love to hear about the Google Slides you create to use in your Biology classroom! Just hit reply to any email and let me know.
I hope you have a wonderful day,